Tired of restrictive diets that leave you hungry and confused about what to eat?
Macro tracking offers a flexible, science-based approach to reaching your health goals, but most beginners don’t know where to start or make critical mistakes that sabotage their progress. Unlike rigid meal plans that tell you exactly what to eat, learning how to track macros for beginners gives you the freedom to enjoy your favorite foods while still hitting your nutrition targets.
This guide will walk you through exactly how to calculate your macro targets, choose the right tracking tools, and avoid the 6 most common mistakes that trip up beginners.
Quick answer: Macro tracking involves monitoring your daily intake of protein, carbohydrates, and fat to meet specific nutrition goals. Beginners should start by calculating their calorie needs, determining macro ratios based on their goals (typically 30% protein, 30% fat, 40% carbs for weight loss), and using a food scale plus tracking app to log meals accurately. With the fitness app market projected to grow from $12.02 billion in 2025 to $39.35 billion by 2034 (Polaris Market Research), more people than ever are discovering the power of structured nutrition tracking.
What Are Macros and Why Track Them?
Before you can learn how to track macros for beginners, you need to understand what macronutrients actually are and why they matter more than just counting calories.
Macronutrients are the three main nutrients your body needs in large amounts: protein, carbohydrates, and fat. Each plays a distinct role in your health and performance, which is why tracking them individually gives you far better results than simple calorie counting.
The Three Macronutrients Explained
Protein provides 4 calories per gram and is essential for building and repairing muscle tissue, supporting immune function, and keeping you feeling full. Your body uses protein as the building blocks for everything from enzymes to hormones.
Carbohydrates also provide 4 calories per gram and serve as your body’s primary energy source. They fuel your workouts, support brain function, and get stored in muscles as glycogen for quick energy access.
Fat is the most calorie-dense macronutrient at 9 calories per gram. Despite its bad reputation, fat is critical for hormone production, nutrient absorption (especially vitamins A, D, E, and K), and cellular health.
Macro Tracking vs. Calorie Counting: What’s the Difference?
Here’s where many beginners get confused: isn’t tracking macros just counting calories with extra steps?
Not quite. While both methods involve monitoring your food intake, macro counting vs calorie counting differs in one crucial way: composition matters as much as quantity.
You could eat 2,000 calories of pure sugar and 2,000 calories of balanced meals with lean protein, healthy fats, and complex carbs—both have the same energy content, but the impact on your body would be dramatically different. Calorie counting only tracks total energy, while macro tracking ensures you’re getting adequate protein for muscle maintenance, enough fat for hormone health, and the right amount of carbs for your activity level.
This makes macro tracking superior for specific body composition goals like losing fat while maintaining muscle, or gaining lean mass without excess fat. For more insights on structured eating, check out our comprehensive nutrition and diet planning guide.
Step 1: Calculate Your Daily Calorie Needs
You can’t determine your macro targets without first knowing how many calories your body needs each day.
This number is called your TDEE (Total Daily Energy Expenditure), and it represents the total calories you burn through basic bodily functions, daily activities, and exercise.
Understanding Your Baseline Metabolism
Your TDEE builds on your BMR (Basal Metabolic Rate), which is the energy your body burns at complete rest just to keep you alive—think breathing, circulation, cell production, and nutrient processing.
The Mifflin-St. Jeor equation is the gold standard for calculating BMR:
- For men: (10 × weight in kg) + (6.25 × height in cm) - (5 × age in years) + 5
- For women: (10 × weight in kg) + (6.25 × height in cm) - (5 × age in years) - 161
Once you have your BMR, multiply it by an activity factor:
- Sedentary (little to no exercise): BMR × 1.2
- Lightly active (1-3 days/week): BMR × 1.375
- Moderately active (3-5 days/week): BMR × 1.55
- Very active (6-7 days/week): BMR × 1.725
- Extremely active (twice per day): BMR × 1.9
Most beginners should use an online TDEE calculator rather than doing the math manually—this eliminates calculation errors and gets you started faster. Simply input your stats and the calculator does the work for you.
Step 2: Determine Your Macro Ratios Based on Goals
Now that you know your daily calorie target, it’s time to break those calories down into protein, carbs, and fat—this is where the magic happens.
Your macro ratios should align with your primary goal. Here are the recommended starting points:
For weight loss:
- 30% protein
- 30% fat
- 40% carbohydrates
For muscle gain:
- 30% protein
- 25% fat
- 45% carbohydrates
For maintenance:
- 10-35% protein (aim for at least 25% for satiety)
- 20-35% fat
- 45-65% carbohydrates
These percentages are starting points, not rigid rules. Individual needs vary based on activity level, personal preferences, and how your body responds.
Converting Macro Percentages to Grams
This is where beginners often get stuck, but the conversion is straightforward once you understand the formula.
Let’s say your TDEE is 2,000 calories and you’re aiming for weight loss with a 30/30/40 split:
Protein calculation:
- 30% of 2,000 calories = 600 calories from protein
- Protein has 4 calories per gram
- 600 ÷ 4 = 150 grams of protein per day
Fat calculation:
- 30% of 2,000 calories = 600 calories from fat
- Fat has 9 calories per gram
- 600 ÷ 9 = 67 grams of fat per day
Carbohydrate calculation:
- 40% of 2,000 calories = 800 calories from carbs
- Carbs have 4 calories per gram
- 800 ÷ 4 = 200 grams of carbs per day
For detailed breakdowns based on different goals, see the guide on how to calculate your personalized macro targets above.
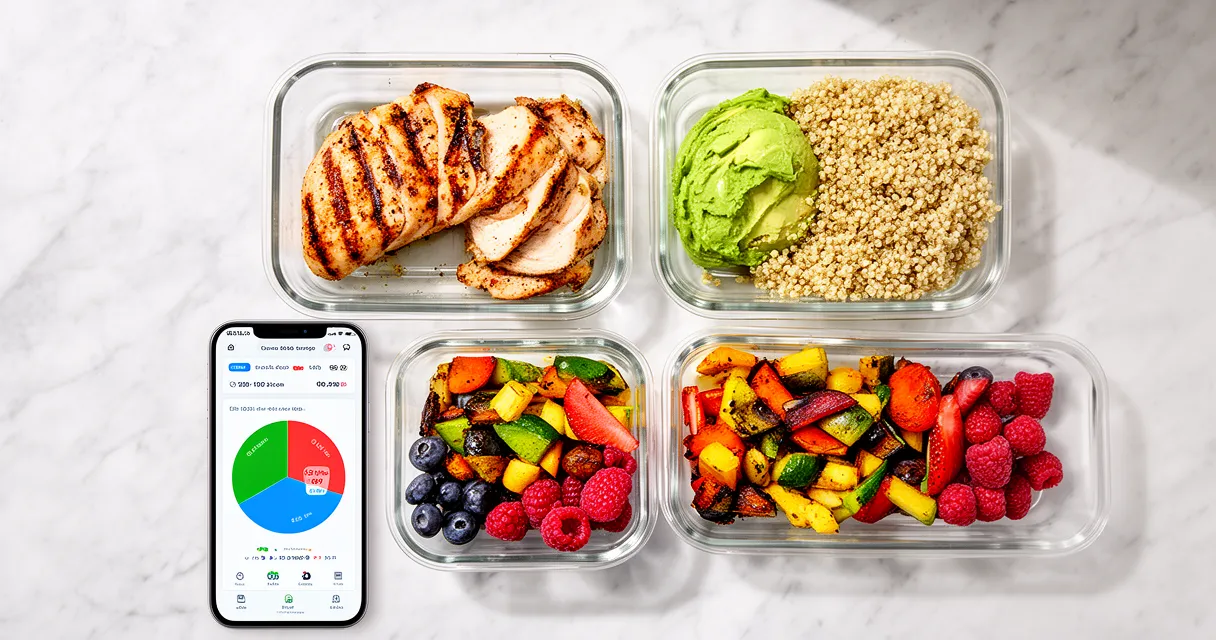
Step 3: Choose Your Tracking Tools
Having the right tools makes the difference between successful macro tracking and giving up after a week of frustration.
The non-negotiable essential is a digital food scale. Everything else is secondary.
Why a Food Scale is Non-Negotiable
Here’s the uncomfortable truth: humans are terrible at estimating portion sizes.
Studies show that people who don’t account for added oils or condiments can underestimate their calorie intake by as much as 15-25% (Kate Lyman Nutrition). That “eyeballed” tablespoon of peanut butter? It’s probably closer to 2-3 tablespoons, turning a 90-calorie snack into a 270-calorie one.
A digital food scale eliminates guesswork. Look for one that:
- Measures in grams (more precise than ounces)
- Has a tare function (lets you zero out container weight)
- Weighs up to at least 5 kg or 11 pounds
- Costs $15-25 (anything fancier is unnecessary)
Best Apps for Macro Tracking in 2026
Integration of AI models that understand text, voice, and images for converting data into nutritional information has caused fitness apps with these logging methods to explode in popularity (TechCrunch). Here’s what to look for when choosing among the best free macro tracker options:
MyFitnessPal
- Pros: Largest food database (14+ million items), barcode scanner, recipe builder, free version robust
- Cons: Free version has ads, macro percentages locked behind premium in some regions
- Best for: Beginners who eat a lot of packaged foods or restaurant meals
Cronometer
- Pros: Most accurate nutritional data, tracks micronutrients, clean interface, rigorous database quality control
- Cons: Smaller food database, steeper learning curve
- Best for: Those who want precision and care about vitamins/minerals
Lose It!
- Pros: Most user-friendly interface, great for weight loss tracking, social features for accountability
- Cons: Macro goals require premium, smaller database than MyFitnessPal
- Best for: Absolute beginners who want simplicity
My Macros+
- Pros: Built specifically for macro tracking, highly customizable, meal templates
- Cons: Not free ($2.99), smaller database
- Best for: Serious macro trackers who want flexibility
For a complete comparison with screenshots and features, check out our review of the best macro tracking apps for beginners above.
You’ll also want measuring cups and spoons as backup for liquids and ingredients difficult to weigh (like nut butters stuck in jars), but these should be secondary to your scale.
Step 4: Start Tracking (Your First Week Strategy)
This is where theory meets practice, and where most beginners either build momentum or get overwhelmed and quit.
Success in your first week comes down to systems over willpower. Here’s exactly how to track macros for beginners during those crucial first seven days:
The Pre-Logging Strategy That Saves Time
Instead of scrambling to log food in the moment, plan and log your meals the night before or first thing in the morning.
Here’s why this works: when you log dinner in the morning, you know exactly how many macros you have left for breakfast and lunch. This eliminates the 6 PM panic of “I only have 15 grams of carbs left for the day” when you’re starving and want pasta.
Pre-logging also reveals problems before they happen. You might discover your planned day has 80 grams of protein when you need 150—much easier to fix at 7 AM than 7 PM.
Raw vs. Cooked: Which Should You Track?
This confuses every beginner: should you weigh chicken breast raw or after cooking?
The answer: either method works, but you must stay consistent.
Weighing raw is technically more accurate because cooking methods and times vary (a chicken breast cooked for 10 minutes retains more water than one cooked for 20 minutes). However, raw weighing requires planning—you can’t just grab leftovers and log them accurately.
If you meal prep or cook at home primarily, weigh raw. If you eat leftovers, share meals, or frequently eat food others prepared, weigh cooked and select “cooked” entries in your app.
The golden rule: Pick your method and stick with it for at least 4 weeks before changing. Consistency beats precision.
Additional first-week tips:
- Log everything: Including cooking oils, butter, salad dressing, cream in coffee, and that handful of nuts. These “invisible” calories add up fast.
- Build your “core four”: Identify 4-5 meals you eat regularly and save them in your app. One-tap logging eliminates daily decision fatigue.
- Embrace the ±10g rule: Hitting exactly 150g protein isn’t necessary. Being within ±10g on protein/carbs and ±5g on fat is perfectly fine.
- Use the barcode scanner: For packaged foods, scanning is faster and more accurate than searching the database.
6 Macro Tracking Mistakes Beginners Make (And How to Fix Them)
Even with the best intentions, beginners fall into predictable traps that derail their progress. Here are the macro tracking mistakes to avoid:
Mistake 1: Eyeballing Portions Instead of Weighing
The problem: Your hand isn’t a reliable measuring tool, and you’re likely eating 20-30% more than you think.
The fix: Use your food scale for everything solid for at least 4 weeks. After that, your portion estimates will be much more calibrated—but still spot-check yourself weekly.
Mistake 2: Forgetting to Log Beverages and Cooking Oils
The problem: 1 tablespoon of olive oil contains 120 calories and 14 grams of fat. If you use 2-3 tablespoons daily for cooking and don’t log it, you’re missing 240-360 calories.
People who don’t track these “hidden” ingredients can underestimate their intake by 15-25% (Kate Lyman Nutrition).
The fix: Measure and log cooking oils, butter, coffee creamer, alcohol, juice, and sports drinks. If it has calories, it counts.
The Hidden Calorie Trap: Oils and Condiments
Beyond oils, condiments add up faster than you think:
- 1 tablespoon ketchup: 15 calories
- 2 tablespoons BBQ sauce: 50-70 calories
- 1 tablespoon ranch dressing: 73 calories
- 1 tablespoon mayo: 94 calories
A “healthy” salad with 3 tablespoons of dressing suddenly has 200+ extra calories you didn’t account for.
Mistake 3: Using Generic Database Entries Instead of Specific Brands
The problem: The entry “chicken breast, cooked” might have wildly different macros from the actual chicken you bought, especially if it’s pre-seasoned or marinated.
The fix: Use the barcode scanner for packaged foods, and create custom foods for items you eat regularly. Check entries against nutrition labels before trusting them.
Mistake 4: Aiming for Perfection Daily Instead of Weekly Consistency
The problem: Obsessing over hitting macros exactly every single day leads to burnout, food anxiety, and eventually quitting.
The fix: Think in weekly totals. If you need 1,050 grams of protein per week (150g × 7 days), having 130g one day and 170g the next is perfectly fine.
Why ‘Close Enough’ is Actually Good Enough
Perfectionism is the enemy of sustainability. Your body doesn’t reset at midnight—it operates on a continuum.
Being within ±10g on protein and carbs and ±5g on fat is functionally identical to hitting exact targets. The stress of chasing perfection often does more harm than being slightly off your numbers.
Mistake 5: Not Planning Meals Ahead
The problem: Decision fatigue hits around 4 PM, you have no idea what fits your macros, and you end up ordering takeout that blows your targets.
The fix: Plan and pre-log at least dinner the day before. Know your go-to “macro-friendly” meals for different scenarios (quick breakfast, work lunch, busy weeknight dinner).
Mistake 6: Ignoring Food Quality in Favor of Hitting Numbers
The problem: 150 grams of protein from chicken and fish is not nutritionally equivalent to 150 grams from protein bars and powder, even though the macros match.
The fix: Use the 80/20 rule—80% of your diet should come from whole, minimally processed foods. The remaining 20% can be treats or convenience foods that fit your macros.
Building the Habit: Your 4-Week Progression Plan
Don’t try to master everything at once. Use this progression to build sustainable tracking skills:
Week 1: Protein Only
- Focus solely on hitting your protein target
- Get comfortable using the food scale
- Learn how to search and log foods in your app
- Don’t stress about carbs or fat yet
Week 2: Add Carbs and Fat Tracking
- Now track all three macros
- Practice weighing mixed meals (calculate each ingredient separately)
- Start noticing which foods are protein-dominant vs. carb-dominant vs. fat-dominant
- Begin building your “favorite meals” list in your app
Week 3: Pre-Logging and Meal Prep
- Log your full day in the morning
- Prep 2-3 core meals for the week
- Identify your “macro gaps” (typically protein) and plan gap-fillers
- Practice adjusting on the fly when plans change
Week 4: Refine and Assess
- Focus on accuracy: double-check entries, verify portion sizes
- Assess whether tracking feels sustainable or stressful
- Decide if you want to continue, track less rigidly, or shift to intuitive eating
- Take progress photos and measurements to evaluate results
By the end of 4 weeks, tracking should take 5-10 minutes per day instead of 30+ minutes in week one.
When to Adjust Your Macros
Macro tracking isn’t set-it-and-forget-it. Your targets will need adjustments as your body changes.
Wait at least 2 weeks before making changes. Daily fluctuations in weight (water retention, digestion, hormones) mask real trends. You need consistent data over time.
Track weight and measurements weekly, not daily. Weigh yourself the same day and time each week (ideally Monday morning after using the bathroom, before eating). Also measure waist, hips, chest, and arms.
When to adjust:
- No weight change after 2-3 weeks: Reduce calories by 5-10% (usually by cutting carbs or fat, keeping protein stable)
- Losing weight too fast (more than 1-2 lbs/week): Increase calories slightly to preserve muscle
- Extreme fatigue or poor workout performance: Increase carbs by 25-50g
- Constant hunger or low energy: Increase protein by 10-20g
Signs you need more carbs:
- Workouts feel terrible
- You’re constantly tired despite adequate sleep
- You feel irritable or brain-foggy
Signs you need more protein:
- You’re hungry all day despite hitting calorie targets
- You’re losing strength or muscle along with fat
- Recovery from workouts is slow
Is Macro Tracking Right for You?
Macro tracking is a powerful tool, but it’s not for everyone—and that’s completely okay.
Who benefits most:
- Athletes and bodybuilders with specific performance or physique goals
- People training for aesthetic competitions or photo shoots
- Those who’ve struggled with intuitive eating or need structure
- Anyone wanting to learn portion sizes and nutritional awareness
Who should avoid or use caution:
- Anyone with a history of disordered eating or obsessive food behaviors
- People who experience high stress or anxiety around food rules
- Those in recovery from eating disorders (consult a professional first)
- Individuals already managing complex health conditions requiring specific diets
Alternative approaches: If macro tracking feels overwhelming, consider intuitive eating with portion awareness—learning general serving sizes and eating mindfully without precise tracking. For more comparison, see the section on macro tracking vs. calorie counting earlier in this guide.
Remember: Macro tracking is a tool for a season, not necessarily forever. Many people track strictly for 8-12 weeks to reach a goal, then shift to relaxed tracking or intuitive eating while maintaining their results.
Frequently Asked Questions
What are macros and why should beginners track them?
Macros (macronutrients) are protein, carbohydrates, and fat—the three nutrients your body needs in large amounts. Beginners benefit from tracking macros because it ensures balanced nutrition beyond just calories, supports specific goals like muscle gain or fat loss, and teaches portion awareness that lasts even after you stop tracking.
How do I calculate macros for weight loss?
First, calculate your TDEE (Total Daily Energy Expenditure) using an online calculator. Subtract 300-500 calories to create a deficit. Then apply a 30% protein, 30% fat, 40% carbs ratio. Convert those percentages to grams by dividing protein and carb calories by 4, and fat calories by 9.
What’s the difference between tracking macros vs calories?
Calorie counting only tracks total energy intake, while macro tracking ensures you get adequate protein for muscle preservation, enough fat for hormone production, and appropriate carbs for performance. You could eat 2,000 calories of junk food or 2,000 calories of balanced meals—same calories, vastly different body composition results.
Do I need to hit my macros perfectly every day?
No. Aim for ±10g on protein and carbs, and ±5g on fat. Think in weekly totals rather than daily perfection. Stressing over hitting exact numbers every day leads to burnout and isn’t necessary for results.
Should I weigh food raw or cooked when tracking macros?
Either works—the key is consistency. Raw weighing is slightly more accurate because cooking methods vary, but cooked weighing is more practical for leftovers and shared meals. Pick one method and stick with it for at least a month.
What are the biggest mistakes beginners make when tracking macros?
The six most common macro tracking mistakes are: eyeballing portions instead of weighing, forgetting to log oils and beverages, using generic database entries, aiming for perfection instead of consistency, not planning meals ahead, and prioritizing macros over food quality.
What free apps can I use to track macros?
The best free macro tracker options include MyFitnessPal (largest food database), Cronometer (most accurate data and micronutrient tracking), Lose It! (most user-friendly interface), and My Macros+ (purpose-built for macro tracking, but costs $2.99). All offer barcode scanning and recipe builders.
Is macro tracking right for everyone?
Macro tracking works best for people with specific body composition goals like athletes, bodybuilders, or those training for events. It’s not recommended for anyone with a history of disordered eating, high food-related stress, or those who prefer intuitive eating. It’s a tool for a season, not necessarily a lifelong practice.
Conclusion
Learning how to track macros for beginners doesn’t have to be complicated or overwhelming. Macro tracking gives you flexible, data-driven control over your nutrition without restrictive rules or eliminating foods you love.
Start simple: calculate your calorie and macro targets, invest in a $20 digital food scale, choose a tracking app that fits your lifestyle, and focus on weekly consistency rather than daily perfection.
Avoid the common beginner mistakes—eyeballing portions, forgetting cooking oils, and chasing perfection—that sabotage progress before you build momentum. Use the 4-week progression plan to gradually build skills without burnout.
Most importantly, remember that macro tracking is a learning tool, not a lifelong requirement. Many people track for a specific goal or time period, then shift to intuitive eating with the portion awareness and nutrition knowledge they’ve gained.
Ready to take control of your nutrition? Start with just protein tracking this week using a food scale and free app, then gradually add carbs and fats as you build confidence. The skills you develop now will serve you long after you stop counting every gram.